Showing posts with label Savouries. Show all posts

Monday, 2 July 2012

Grilled Apple and Cheese Sandwiches

This post is the first in a series of 'Easy Eats' which will be super-simple, but still tasty, recipes that don't require planning and can be whipped up in a flash using ingredients you may well already have. They're mostly going to be lunches, but I might throw in some snacks or breakfasts along the way to mix it up a bit!
 
Apple in a toasted sandwich?

Weird, huh? But weird in a really, really delicious way!


I guess it kind of makes sense- on a cheese platter apple goes hand-in-hand with cheese, so why not in a sandwich? The sweetness balances the sharpness of the cheese; the tangy apple cuts the richness of the cheese. Perfect match if you think about it!


You could do this same sandwich with all sorts of different fruits if you wanted to be really adventurous- pear, grapes, even pineapple if you wanted to go all-out! And you could mix the cheese up a bit too- I used a vintage tasty, but fancier cheeses like goats cheese or blue cheese would be delicious! I also intend to try jam instead of the fruit- sweet!

In conclusion, Fruit+Grilled Cheese Sandwich=Yum!

Grilled Apple and Cheese Sandwich

2 slices thick, crusty sourdough
4-5 thick slices vintage tasty cheese
1/4 apple, thinly sliced
Small amount of butter, to grease

1. Cover one slice of bread with cheese, then apple slices on top of that. Close sandwich.
2. Melt the butter in an electric frypan on medium heat. Put the sandwich in, and grill until lightly browned. Flip and allow the other side to brown. Remove from pan and enjoy! Yield: 1 sandwich

Mia :)

Thursday, 28 June 2012

Italian Vegetable Soup

When you follow a recipe and create something delicious, you feel happy. But when you kind of make something up and just throw stuff together and something delicious appears, you feel even happier.


This soup was one of those 'I'll just add some of this-and-that' moments. It was based on a recipe, but every little addition or thing I left out took it further and further from that recipe. Their recipe was for an Italian beef broth soup with macaroni and vegetables. Mine somehow became a vegetarian, creamy Italian soup with NO macaroni and even more vegetables.

It was, luckily, still delicious, and suited the focaccia I made the other day perfectly. Everyone enjoyed it, and Eva (my younger, pasta and rice loving sister) chose it OVER a bowl of pasta. Hurrah!

I think I'll make this again, although chances are it'll change a little every time. Treat this recipe as a guideline, make it suit you! Serve it as a broth if you desire, or add some pasta. Use the vegetables you happen to have on hand and substitute anything you dislike. Use beef or chicken stock if you so desire. Make this soup yours!


Italian Vegetable Soup
Based on: http://www.tasteofhome.com/Recipes/Simple-Italian-Vegetable-Soup


Ingredients

  • 2 medium carrots, diced
  • 1 small onion, chopped
  • 1 tablespoon olive oil
  • 2 garlic cloves, minced
  • 800 ml vegetable stock
  • 1 can (400g) diced tomatoes, undrained
  • 2 cups water
  • 1 small zucchini, diced
  • 1 cup mushrooms, stalks removed and roughly chopped
  • 2 tablespoon basil
  • 1 teaspoon salt
  • 1/2 teaspoon dried oregano
  • 1/4 teaspoon pepper
  • 2 to 3 drops hot pepper sauce
  • 1 can (400g) kidney beans, rinsed and drained
  • 1 cup chopped fresh spinach
  • 3/4 cup uncooked elbow macaroni
  • 2 tablespoons minced fresh parsley
  • 1/2 cup shredded Parmesan cheese

  • Method

    1. In a Dutch oven, saute carrots and onion in oil until tender. Add garlic; cook 1 minute longer. Stir in the broth, tomatoes, water, zucchini, mushroom, basil, salt, oregano and pepper. Bring to a boil. Reduce heat; cover and simmer for 15 minutes.
    2. Stir in the kidney beans, spinach and parsley. Cover and cook 15 minutes longer or until spinach is cooked to your liking. Optional: Using a stick blender, blend the soup until it reaches your preferred consistency. Garnish with cheese and serve with a crusty bread or focaccia. Yield: 4 servings*

    Mia :)  

    * Obviously, if you edit it a lot, the yield may change. Keep this in mind!

    Tuesday, 26 June 2012

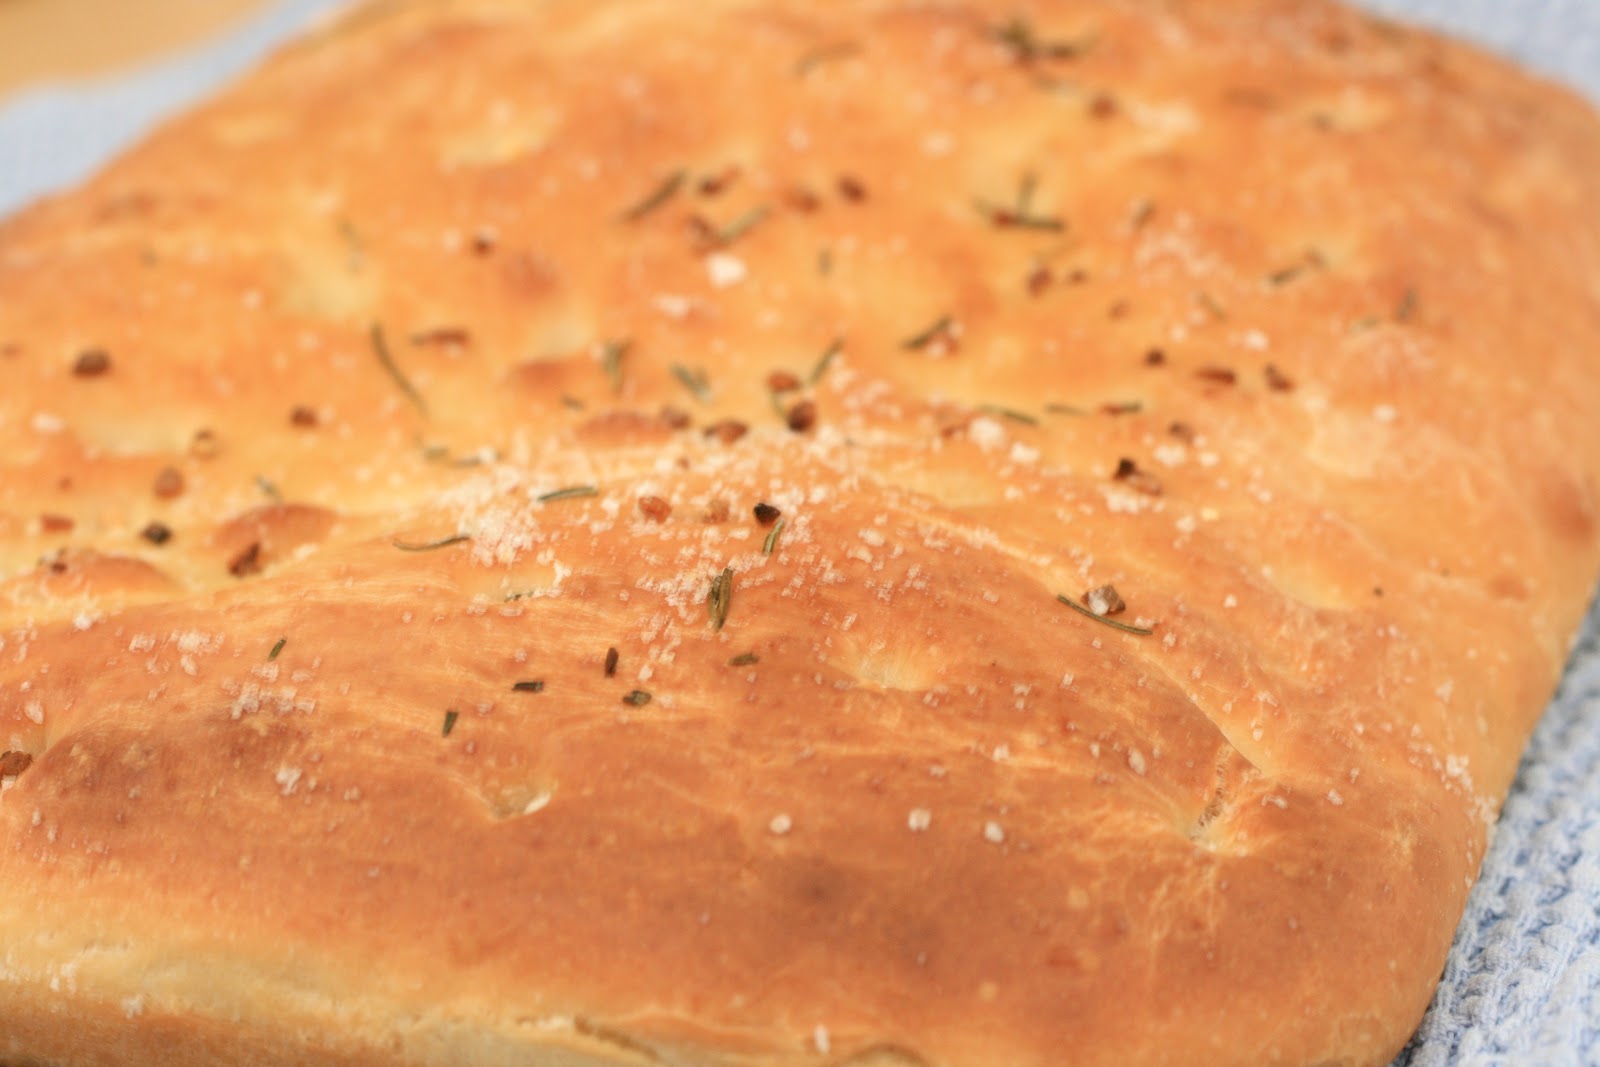
    Garlic, Rosemary and Sea Salt Focaccia


    I love the simple pleasure of baking bread.

    The smooth, elastic dough between your fingers as you knead. The excitement of seeing how much your bread has risen. The eager, nervous anticipation as you watch it cook. The lovely smell, drifting through your house. Most of all, the joy of a warm, delicious mouthful of bread that you know you made.


    This recipe fulfills all of those fantasies. Plus, it came with the thrill of trying something new and succeeding! Now, if you've been hanging out here for a while, you'll know I'm a wee bit addicted to that thrill. I almost never choose to cook something I've made before- and if I do, I have to change it up a bit; fill it, flavour it, ice it! Making a focaccia had long been on my list of things to try- it came with all the joys of baking bread, but was just different enough to warrant calling it 'a new skill'.

    In the school term I barely ever bake bread. All the things that make it so wonderful- proving and kneading and baking- take a long time and a long time is one thing I rarely have during the term. That's how focaccia kept getting ignored on my list of things to try and stayed there so very long. But in a way, that made baking this loaf all the more special.

    Having said that, however, this recipe is so quick and easy that I think I might make it in the school term. Sunday morning I could make it and it'd be ready just in time for a warm, delicious lunch! This was possibly the quickest of all the focaccia recipes I saw, and although you need a while, proving and baking times leave plenty of time to do whatever else you need to.

    I kept this loaf very simple because I'm intending to serve it with a beautiful Italian vegetable soup for dinner, but if you wanted to make it more elaborate to serve on it's own you could top it to your heart's desire! I'm intending to try a tomato (maybe even sundried?), olive and feta one for lunch at some point. Marinated eggplant or capsicum also seem like they'd suit, or maybe goats cheese if we were going to go all out extravagant? Oh the possibilities!

    Garlic, Rosemary and Sea Salt Focaccia
    Based on: http://www.taste.com.au/recipes/1789/olive+rosemary+focaccia

    Ingredients
    • 310ml (1 1/4 cups) warm water
    • 2 tsp (7g/1 sachet) dried yeast
    • 2 tsp caster sugar
    • 3 1/2 tbs olive oil
    • 450g (3 cups) plain flour
    • 2 tsp sea salt flakes
    • 1 1/2 tbs fresh rosemary leaves
    • 2 tsp garlic, crushed*
    Method
    1. Combine the water, yeast, sugar and 2 tablespoons of oil in a small bowl. Set aside in a warm, draught-free place for 5 minutes or until frothy.
    2. Place flour and half of the sea salt in a bowl. Make a well in the centre and pour in yeast mixture. Use a wooden spoon to stir until combined, then use your hands to bring the dough together in the bowl.
    3. Turn onto a lightly floured surface and knead for 10 minutes or until smooth and elastic. Brush a bowl with oil to grease. Place dough in bowl and cover with plastic wrap or a damp tea towel. Set aside in a warm, draught-free place for 45 minutes or until doubled in size.
    4. Preheat oven to 200°C. Brush a 20 x 30cm Swiss roll pan with 2 teaspoons of remaining oil. Punch down centre of the dough with your fist. Turn onto a lightly floured surface and knead for 2 minutes or until dough is elastic and has returned to original size. Press into the prepared pan. Cover with a damp tea towel and set aside in a warm, draught-free place to prove for 20 minutes or until doubled in height. Use your finger to press dimples into the dough. Brush with remaining oil and sprinkle over rosemary, garlic and remaining salt. 
    5. Bake in oven for 25-30 minutes or until golden and focaccia sounds hollow when tapped on base. Serve warm or at room temperature.
    6.  
    Mia :)

    *I actually used dried minced garlic, because we *gasp* only have one clove of garlic in the whole house! If you would prefer to use dried, it worked out well, but otherwise I imagine fresh would be even yummier!

    Monday, 23 April 2012

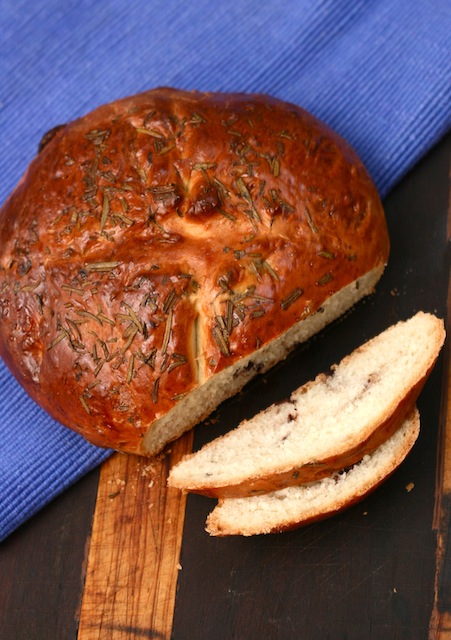
    Olive and Rosemary Bread


    There is nothing better than a fresh, warm loaf of bread.


    Nothing.

    It's usually Dad who makes bread in our house. Beautiful Sourdoughs, with days of effort and care in them.

    But this loaf doesn't ask for days of effort and care. Not at all! 


     Maybe half an hour of your time, and two hours of resting. That's all these loafs want. They're not greedy, that's for sure.

    Which makes them perfect for a weekend morning. Prepare them, go get some stuff done while they rise, shape the loaves, get some more stuff done and bake them. Voila! Fresh bread!

    But this isn't just your average loaf either. It's moist, stays soft and is full of olives and rosemary.


    It's delicious! Do I have you sold?

    I'd recommend fiddling with it- add whatever you please! I think nuts, dried fruits, different herbs or sun dried tomatoes would all be nice. Add them during the punchdown- a short knead to get the air out of the dough.

    What would you add to the bread?

    Olive and Rosemary Bread
    Based on: http://allrecipes.com/recipe/delicious-rosemary-bread/detail.aspx and http://mademoisellesonushka.blogspot.com.au/2012/03/rosemary-olive-bread.html


    • Ingredients
    • 1 tablespoon white sugar
    • 1 cup warm water
    • 1 (.25 ounce) package active dry yeast
    • 1 teaspoon salt
    • 2 tablespoons butter, softened
    • 2 tablespoons rosemary
    • 1 teaspoon Italian seasoning
    • 3 cups bread flour
    • 1 tablespoon olive oil
    • 1 egg, beaten

      1. Dissolve the sugar in warm water in a medium bowl, and mix in the yeast. When yeast is bubbly, mix in salt, butter, 1 tablespoon rosemary, and Italian seasoning. Mix in 2 cups flour. Gradually add remaining flour to form a workable dough, and knead 10 to 12 minutes.
      2. Coat the inside of a large bowl with olive oil. Place dough in bowl, cover, and allow to rise 1 hour in a warm location.
      3. Punch down dough, and divide in half. Line a baking sheet with parchment paper. Lightly grease paper. Shape dough into 2 round loaves, and place on the baking sheet. Sprinkle with remaining rosemary. Cover, and allow to rise 1 hour, or until doubled in size.
      4. Preheat oven to 375 degrees F (190 degrees C).
      5. Brush loaves with egg. Bake 15 to 20 minutes in the preheated oven, or until golden brown.

    Mia :)

    Tuesday, 17 April 2012

    Circular Cheese Stars (otherwise known as holiday baking)


    Now I'm going to start by saying that I'm not quite as insane as you might think. I'm well aware that stars are not circular.

    Phew!


    (excuse my horrible photography. at home everyone's used to the 'half hour photography
     before anyone can eat' routine, but it seemed unfair to keep my grandparents waiting. 
    especially after someone had already eaten one of the top of the plate!)

    In fact, I wish my cheese stars hadn't been circular. It's just that… well… I forgot the cookie cutter!

    And the rolling pin…

    But never fear, the humble drinking glass is here!

    A rolling pin and a cookie cutter all in one- you can even drink out of it!

    You don't think about all those little things you use in the kitchen until they're missing- cups, tablespoons, proper baking trays, cookie cutters and rolling pins!

    Still, they're perhaps not as important as we might think- I appear to have gotten through fine.

    We're also living (pretty much) without the internet. Apart from the odd, very brief, phone hotspot, there's no internet access. 

    At all!

    Again, we do seem to be surviving, but I don't know how long we'll last.

    We're at a library right now though, basking in the slow but free internet.

    Oh! I'm a bit off topic. I'll get back to the biscuits now.

    They're delicious and very, very easy!

    They don't make many- maybe 15 or so- but they go quickly and are great hot out of the oven!

    Cheese biscuits (in whatever shape you like!)
    Based on: http://bakemedelicious.blogspot.com.au/2010/04/cheese-stars-or-hearts-story.html

    Ingredients
    1 cup plain flour
    6 tbsp (85g) butter
    1 cup tasty cheese, grated
    1/4 tsp mustard powder
    1 small egg
    Milk, to mix

    1. Rub together the flour and butter in a bowl until they have a sand like texture.
    2. Add the cheese and mustard powder. In a separate bowl, whisk the egg and add. Mix well.
    3. Mix with your hands until a ball forms. Add milk if necessary.
    4. Chill in the fridge for half an hour. Preheat the oven to 180˚c. 
    5. Roll out on a lightly flowered bench to roughly 1 cm thick. Cut into whatever shape you like.
    6. Bake for 10 minutes. Serve while warm, or allow to cool.

    Enjoy!

    Mia :)

    Sunday, 5 February 2012

    Char Kway Teow

    Hey!


    I thought you you might like to pop over to Almost Vegie to see the post I did there this morning.


    Almost Vegie is Mum's blog, but I post on it from time to time.


    There's some really cool stuff, so why not check it out?


    I made Char Kway Teow which is a Malaysian rice noodle dish.


    Yummo!


    Mia :)


    PS. I have something special planned for tomorrow afternoon, so be sure to check back then!
    Related Posts Plugin for WordPress, Blogger...